Thinking & coding: linking the NavRail to the screens.
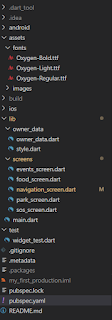
In this session I have created all the main screens of my app that I will need. In my case, those are 5 main screens that can be reached from the navigation page. I have created these screens because I need them to test the navigation rail routing. For now I just colored all screens. Offcourse I had to imort all the screens, to be able to call them.
In the Classe HomeScreenState I have made a list of the different main screens. This list is then linked to the selected index of the Navigation Rail. And so I can call up and display the screens to the right of the Rail. This was compleet new to me.
I would love to hear in the comments whether this is the correct way of routing or whether it can be done in a better way.
1 2 3 4 5 6 7 8 9 10 11 12 13 14 15 16 17 | class HomeScreen extends StatefulWidget { HomeScreen({Key key}) : super(key: key); @override _HomeScreenState createState() => _HomeScreenState(); } class _HomeScreenState extends State<HomeScreen> { int selectedIndex = 0; var list = [ NavigationScreen(), EventScreen(), ParkScreen(), FoodScreen(), SosScreen() ]; |
Wow, this was actually a nice new milestone in my app for me.
In the next session I will build the NavigationScreen. I'm going to do this in the standard theme colors. Then I want to adapt the project theme to the prototype design. For that I will have to study how to best build my own theme. The problem is that I have already found so many different ways on the internet and youtube that I don't know which is the best or the most perfomant. After all, this is a project that is going into production and not a test.
Do, believe and be happy,
Stefaan
1 2 3 4 5 6 7 8 9 10 11 12 13 14 15 16 17 18 19 20 21 22 23 24 25 26 27 28 29 30 31 32 33 34 35 36 37 38 39 40 41 42 43 44 45 46 47 48 49 50 51 52 53 54 55 56 57 58 59 60 61 62 63 64 65 66 67 68 69 70 71 72 73 74 75 76 77 78 79 80 81 82 83 84 85 86 87 88 | import 'package:flutter/material.dart'; import 'package:my_first_production/screens/events_screen.dart'; import 'package:my_first_production/screens/food_screen.dart'; import 'package:my_first_production/screens/navigation_screen.dart'; import 'package:my_first_production/screens/park_screen.dart'; import 'package:my_first_production/screens/sos_screen.dart'; void main() { runApp(MyApp()); } class MyApp extends StatelessWidget { // This widget is the root of my application. @override Widget build(BuildContext context) { return MaterialApp( home: HomeScreen(), //is the landingspage where all navigation happens. Inside this screen is the Naviagtion screen. ); } } // this screen holds the ROW with left the NavRail end right the screens class HomeScreen extends StatefulWidget { HomeScreen({Key key}) : super(key: key); @override _HomeScreenState createState() => _HomeScreenState(); } class _HomeScreenState extends State<HomeScreen> { int selectedIndex = 0; var list = [ NavigationScreen(), EventScreen(), ParkScreen(), FoodScreen(), SosScreen() ]; @override Widget build(BuildContext context) { return Scaffold( body: Row( children: [ NavigationRail( onDestinationSelected: (newIndex) { setState(() { selectedIndex = newIndex; }); }, elevation: 3, backgroundColor: Colors.green[100], groupAlignment: 0, selectedIndex: selectedIndex, destinations: [ NavigationRailDestination( icon: Icon(Icons.home_outlined), label: Text('Home'), ), NavigationRailDestination( icon: Icon(Icons.event_available), label: Text('Events'), ), NavigationRailDestination( icon: Icon(Icons.local_parking_outlined), label: Text('Parking'), ), NavigationRailDestination( icon: Icon(Icons.fastfood_outlined), label: Text('Food'), ), NavigationRailDestination( icon: Icon(Icons.medical_services_outlined), label: Text('S.O.S.'), ), ], ), Expanded( child: Stack( children: <Widget>[list[selectedIndex],], ), ) ], ), ); } } |
1 2 3 4 5 6 7 8 9 10 11 12 13 14 15 16 17 18 19 20 21 22 23 24 25 26 27 28 29 | import 'package:flutter/material.dart'; class NavigationScreen extends StatelessWidget { const NavigationScreen({Key key}) : super(key: key); @override Widget build(BuildContext context) { return Container( decoration: BoxDecoration( color: Colors.white, image: DecorationImage( image: AssetImage('assets/images/Background.png'), fit: BoxFit.cover), ), child: Scaffold( backgroundColor: Colors.transparent, body: Column( children:[ SizedBox(height:100), Padding( padding: const EdgeInsets.fromLTRB(20, 0, 0, 0), child: Text('Home Screen'), ), ] ), ), ); } } |

Comments
Post a Comment